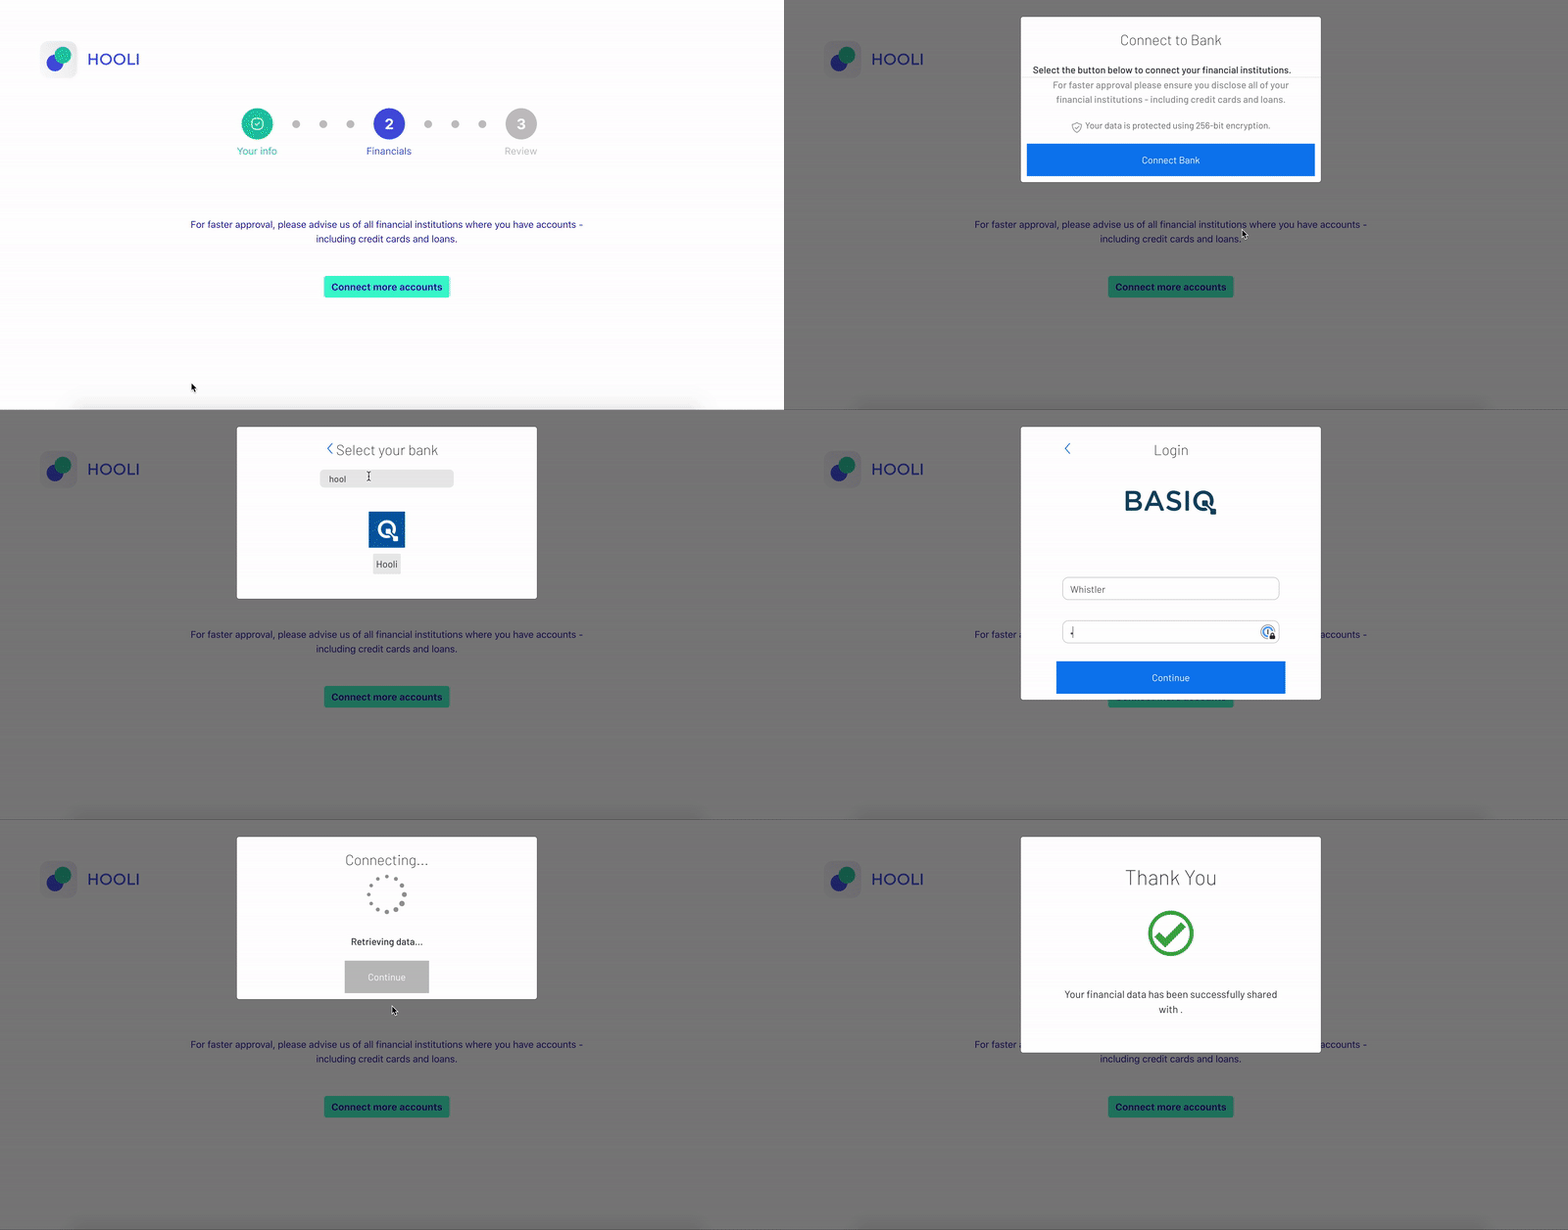
Basiq's simple UI
The Basiq Connect Control is a UI component that allows applicants to securely connect their bank accounts. It's written in React, however it exposes a vanilla JavaScript interface ensuring it can be used across all frameworks. You can see an example of how it looks in production here:

Installation
Regardless of the JS framework you are using (Angular, VueJS), you will need to install react and react-dom.
Install basiq-connect-control and it's dependencies:
$ npm install react react-dom
$ npm install @basiq/basiq-connect-control
OptionalIf you are concerned about your app supporting Internet Explorer you may also install polyfill libraries such as
core-jsandreact-app-polyfill.
Usage
The package exports a single function which takes a config object as a parameter. Calling this function will render the bank picker to the user.
Where to call BasiqConnect()
BasiqConnect()If you’re using vanilla JavaScript, you can call BasiqConnect() anywhere after the host DOM element is loaded. If you are using React to build your application you should call it either in componentDidMount, or, if you are using React Hooks, in useEffect.
import React, { useEffect } from 'react';
import BasiqConnect from "@basiq/basiq-connect-control"

export const BasiqConnectModal = (() => {
  let config = {
    containerId: "basiq-control",
  	userID: userId,
    token: access_token
  }

  useEffect(() => {
          BasiqConnect(config)
      }, [])

      return <div id="basiq-control"></div>
})
A common place for the BasiqConnect picker is in a modal, attaching the open method to a button such as “Connect your accounts”.
The config object
A number of parameters can be passed through the config object. Most are optional values however authentication params are required and can be provided by:
-
Sending the
userIdandaccess_token, which can be obtained via the BasiqAPI (See the quick start guide); or -
Sending the
connectLinkId, which can be obtained from the auth_link endpoint
{
    // required fields
    containerId: String, // ID of the DOM element to which Basiq Connect Control will be rendered;

    // and either
    token: String, // CLIENT_ACCESS scope
    userID: String,
    // or
    connectLinkId: String,

    // optional fields
    upload: Boolean, // should uploading statements be enabled
    connect: Boolean, // should connecting to bank with credentials be enabled
    companyName: String, // company name to be shown, will default to Basiq Dashboard name
    regionOfInstitutions: String, // valid values: Australia, New Zealand
    hideTestBanks: Boolean, // should test banks (Basiq, Hooli) be hidden from user
    hideBetaBanks: Boolean // should beta banks be hidden from user
}
Handling JobsA connection is created via the Basiq UI control when a user submits their login credentials. This kicks off a job in the background and triggers a custom
jobCreatedevent in the browser, passing your application thatjobId. If you want to subscribe to this event, you just need to add a listener to subscribe to it.You can now poll the
jobs/{jobId}endpoint to check the status of each step:const handleNewJob = async (event) => { let jobId = await event.detail.id; pollJob(jobId) } window.addEventListener("jobCreated", handleNewJob);This allows you to:
- Perform actions as soon as the step you rely on is complete without waiting for the following steps,
- Allow your user to carry on with their flow, keeping them engaged, and
- Effectively manage any failed jobs, which is crucial to your application. See the best practices for managing failed jobs.
And that’s it, Basiq now handles all the connections within that UI component!
Source codeYou can check out the Github repo and our NPM registry for more info.
Updated about 1 year ago
