Quickstart: code free

The following guide will help you to get up and running with the Basiq API without writing any application code. It uses Postman and is suitable for both technical and non-technical audiences.
If you would prefer to integrate your application with the API directly, and aren't afraid to get your hands dirty writing some code, you might be more interested in our Quickstart.
Postman app requiredPostman is an API development tool which gives users a platform to make requests to any API. It's often used by developers to test out their own API's, however many of their consumers come from a non-technical background wanting to interact with a public API. We have curated a Postman collection for this use case, which features all of our API endpoints and makes it simple to get up and running using the platform.
If you don't already have the app you can download it here.
STEP 1: Register
Register your application via our dashboard and create a new application (do not use the demo app that is created by default). All applications in dashboard are using v3.0 by default. When you have created and configured your new application, generate an API key under the Developers tab.
API KeysYou can create as many API keys as you want, which allows you to use keys across different applications and environments. It’s a good idea to give each API key a meaningful name in order to differentiate between them.
Make sure you copy and save the key we give you straight away, as it will only be exposed it in full once. Your API keys carry many privileges, so be sure to keep them secret!
STEP 2: Grab our sample code
Go to our sample code (also known as the Postman Collection) and click Run in Postman:

Make sure you select the Postman app that was installed earlier (the option will display your operating system, e.g. Mac/Windows).
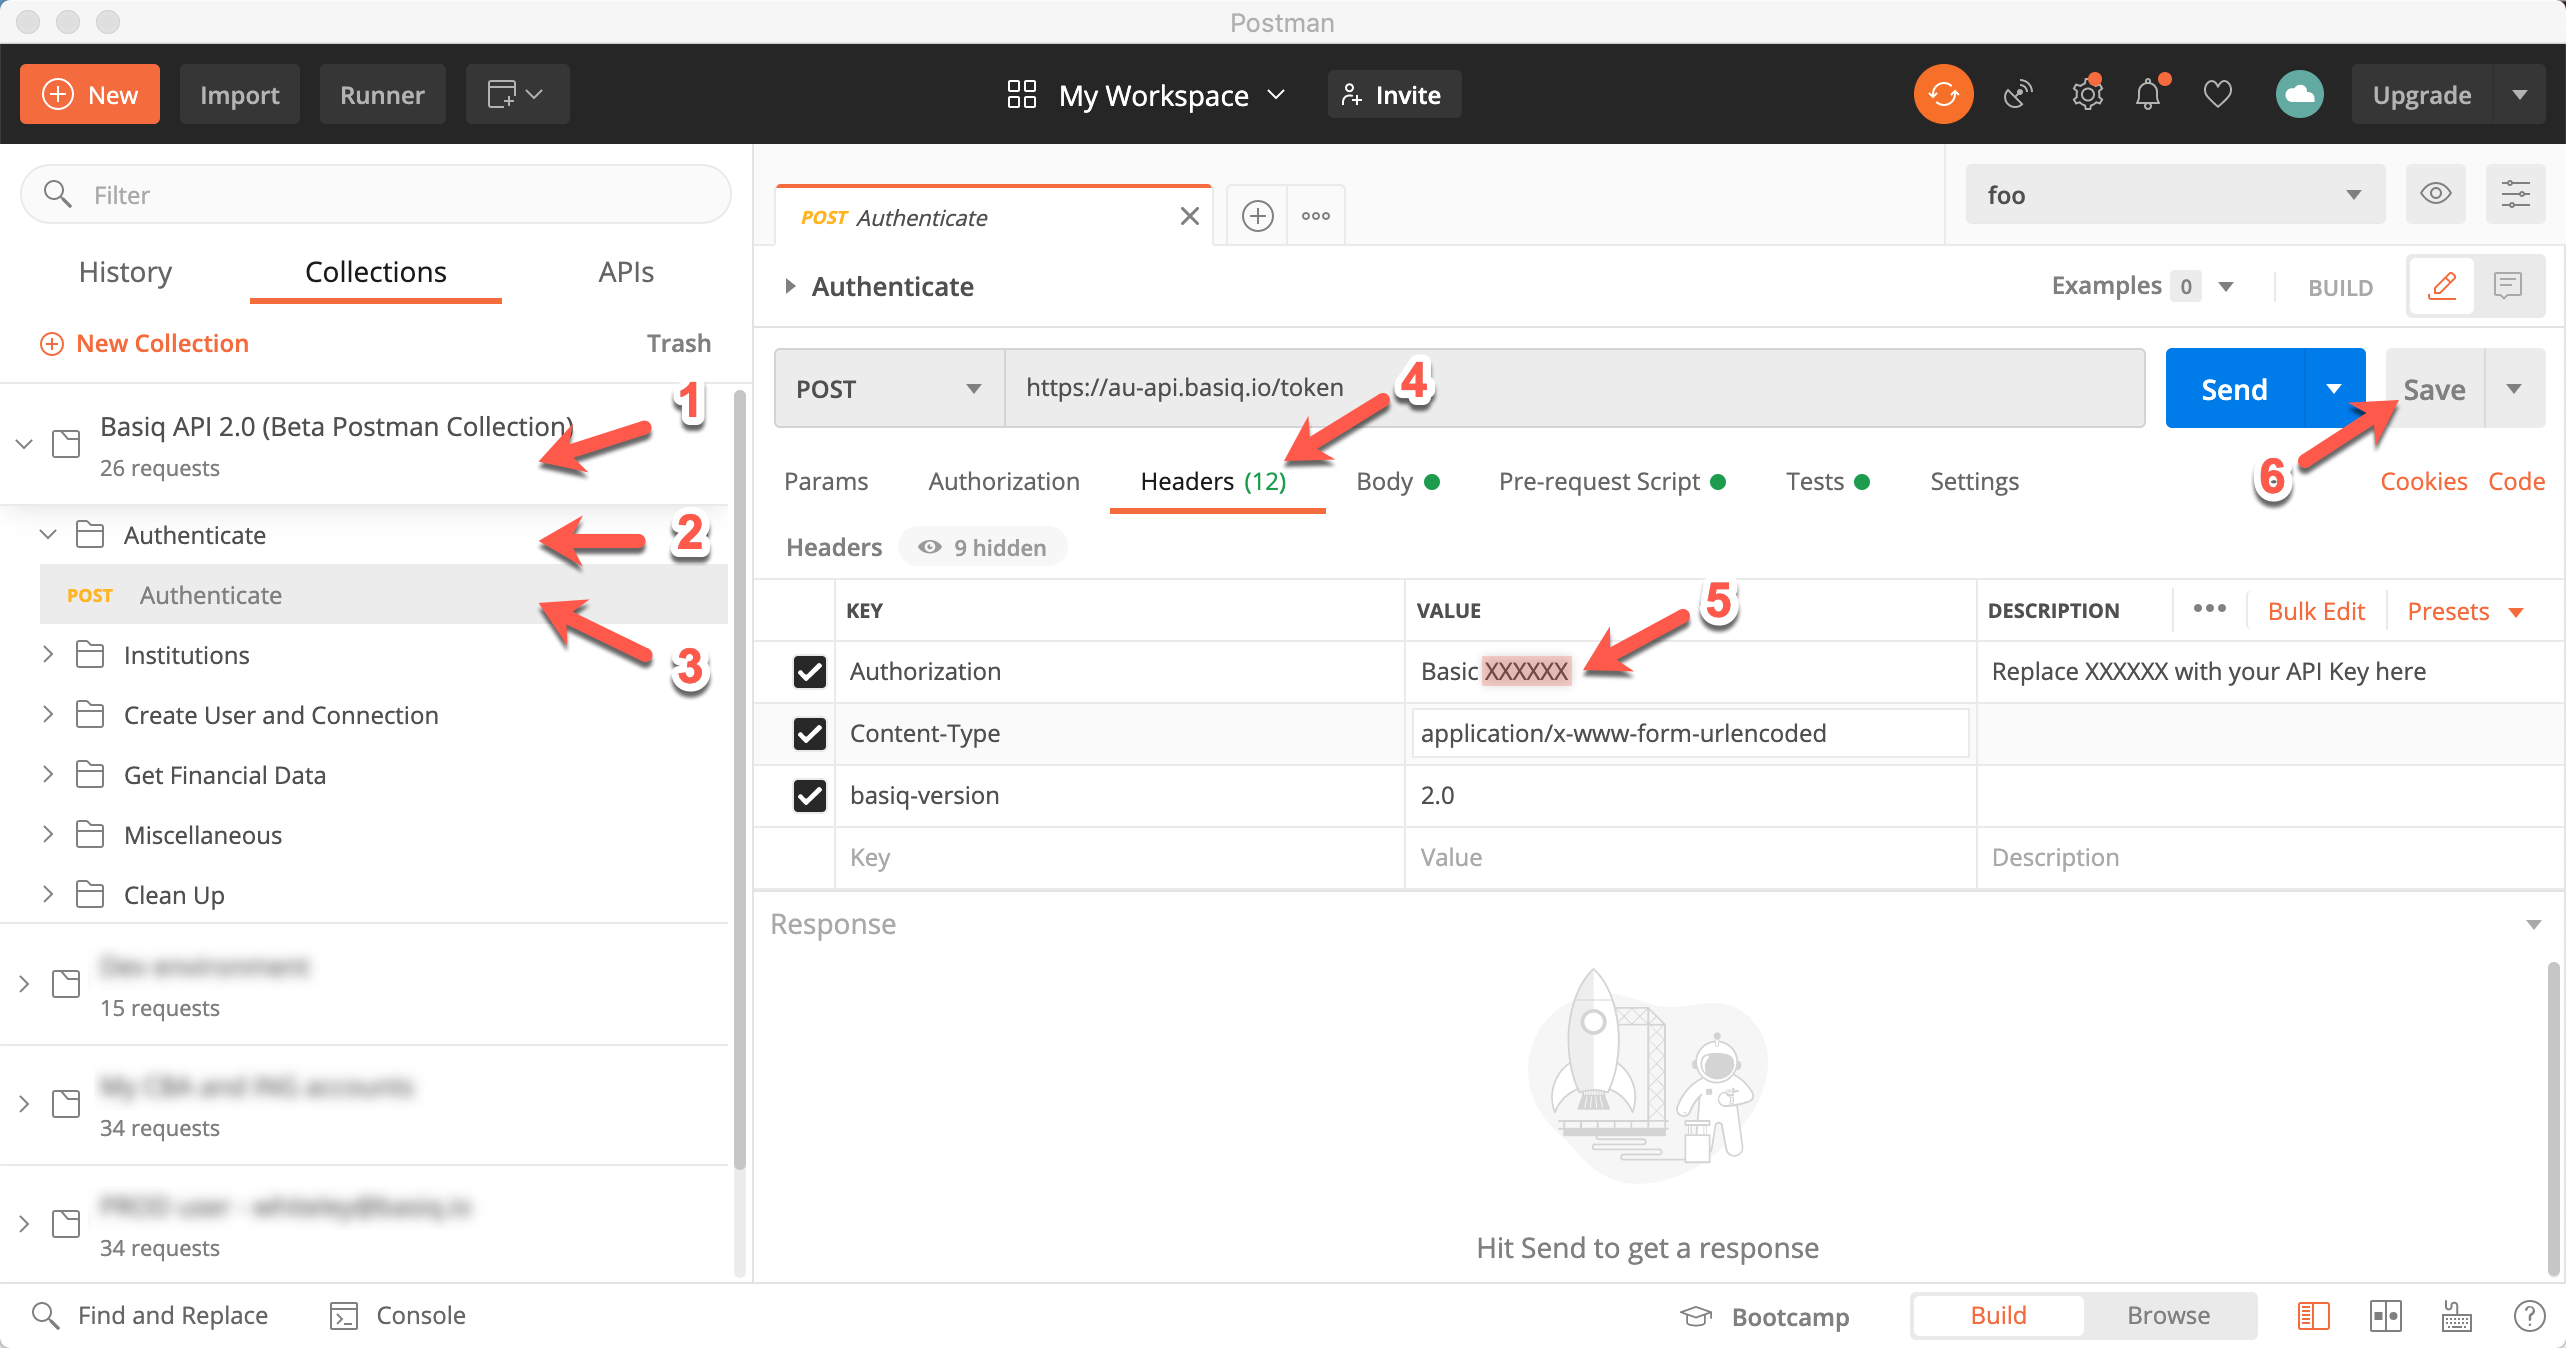
STEP 3: Authenticate
In Postman click on the menu options [ 1 ], [ 2 ], [ 3 ] & [ 4 ]
[ 5 ] Then replace XXXXXX with the API Key you generated via the dashboard in Step 1
[ 6 ] Click Save, then Send to make the request.
Your access token will last an hourDon't forget: Your access token will expire every 60 minutes, so refresh as you need to.
STEP 3: Create a user
Creating a user gives you a "bucket" to store all your financial data. Upon successful creation of a user, you will receive a userId. Hold onto this for the next step.
Creating a user requires a SERVER_ACCESS scoped token
STEP 4: Create your first User Consent and Connection
All consent management and connection creation is done via the Basiq Consent UI. Once you have your userId and access_token, access the Consent UI via:
https://consent.basiq.io/home?token={{client_token_bound_to_userId}}
Consent UI URLThe token must not be enclosed in parenthesis
{{}}
to start aggregating data. You can use our sandbox environment to replicate real life data. Find the credentials here.
Note: The Consent UI requires the token to be bound to a specific user by attaching the userId as well as CLIENT_ACCESS scope to the request
STEP 5: Make your requests!
Basiq's full suite of products are available when you use the Postman collection, ready for you start making all of your requests.
In order to connect to Basiq's test banks, you will need to use the sandbox user logins. You can find the credentials for all scenarios here.
Note: You are free to make as many request as you like, however we cap the connections for sandbox users at 500 per account. If you would like to increase this quote, please email us at [email protected].
📢 Attention! If you have any issues, please reach out to our amazing support team.
Updated about 1 year ago